Showing posts with label gluten free. Show all posts

Methi Matar Malai Recipe | How to make Methi Matar Malai [Video]


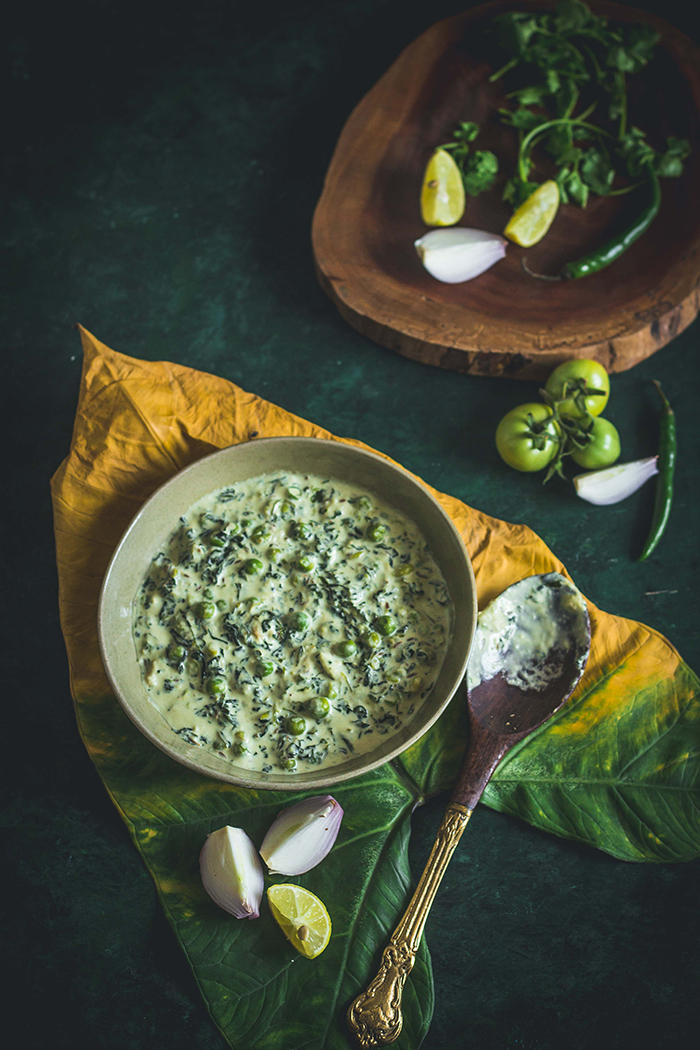
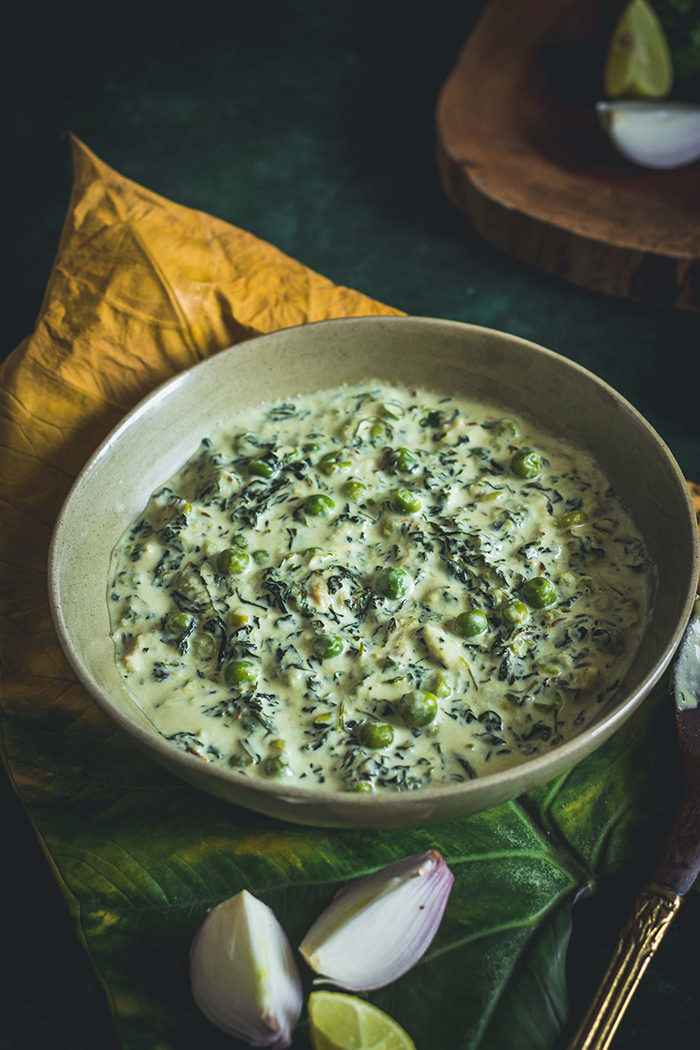
Methi Matar Malai Recipe with step by step video instructions. Methi Matar Malai is a creamy mildly flavored curry made from methi or fenugreek leaves, fresh green peas and cream (malai). 

In a hurry? Jump to Video or Jump to Recipe

methi matar malai recipe, methi mutter malai, vegan methi matar malai


There are days when I crave a spicy tantalizing curry that can set my mouth on fire. And then there are days when all I want is milder flavors that calm my soul. This Methi Matar Malai curry is the latter. It is a very mildly spiced creamy curry that pairs excellently with soft roti or naan.

What is Methi Matar Malai?


Methi Matar Malai as the name states, is a curry heroing the 3 main ingredients - Methi leaves or Fenugreek leaves, Matar or Green Peas and Malai or fresh cream. The methi leaves, which are usually slightly bitter are tamed by the creaminess of the malai and the sweetness of fresh peas. You can use fresh or frozen peas here, I will call them both "fresh" as opposed to the dried green peas.

This is more of a winter curry, as both methi leaves and green peas are pretty much at their seasonal best in winters and the warmth and richness of cream just adds that additional coziness to the curry.

To make Methi Matar Malai, we cook together onion, ginger, garlic and cashew nuts, yes, cashews, coz one can never have enough creaminess. Am I right? So this cooked onion-cashew goodness with just a hint of green chillies is blended and forms the gravy base for the curry. The methi leaves are cooked until they wilt and then the blended puree is added and the methi leaves are cooked in this masala until completely cooked. Then boiled green peas are added and the curry is finished off with fresh cream.

methi matar malai recipe, methi mutter malai recipe, vegan methi matar malai


Can this curry be Veganized?

Absolutely, yes!! Read on...

While cream is a major part of the curry, it can be replaced by 2 things - plant milk or cashew cream.

Use any plant based milk that is unflavored. Using milk instead of cream will however, make the curry a bit thinner in consistency, so you may need to reduce the amount of water you add at the start.

The other way to have the same creaminess and the same consistency, is to use cashew cream. To make cashew cream, soak a quarter cup of cashews in hot water for 30-40 minutes. Then drain and blend with very little plant milk or water until completely smooth. Use this as regular cream in the recipe. 

Enjoy!!

Methi matar malai, methi mutter malai, vegan methi matar malai

If you made this recipe, let me know! Leave a comment here or on Facebook tag your tweet with @oneteaspoonlife on Twitter and don't forget to tag your photo @oneteaspoonoflife on Instagram. You can also email me at onetspoflife@gmail.com I'd love to see what you are up to.

If you like this recipe, do not forget to share it with your friends and family! 


You can follow One Teaspoon Of Life on FacebookTwitterInstagramPinterest or you can subscribe to One Teaspoon Of Life and receive all the latest updated via Email


Video Recipe


--------------------------------------------------------------------------------------------------------------------------


Methi Matar Malai Recipe | How to make Methi Matar Malai
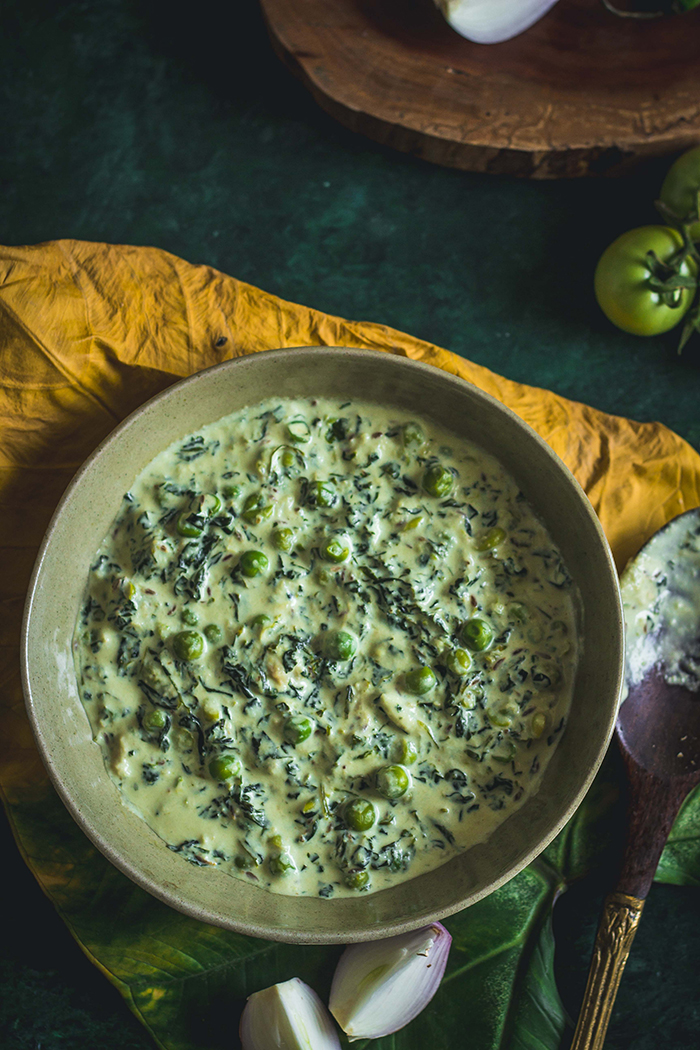

methi matar malai recipe, methi mutter malai, vegan methi matar malaiMethi Matar Malai is a creamy Indian curry made with fenugreek or methi leaves, fresh green peas and cream. It is a mildly spiced curry.

Recipe Type:   Side
Cuisine:            North Indian
Prep Time:     30 minutes
Cook time:     45 minutes
Total time:     75 minutes
Yield:                Serves 2-3

Ingredients:


2 cups Methi leaves, washed thoroughly and chopped
0.75 cup Green peas (fresh or frozen), boiled
1 large Onion, chopped
10-12 Cashew nuts
1 Tbsp Ginger, chopped
3-4 Garlic cloves
1 tsp Green chilli paste or 2-3 Green chillies, finely chopped
4-5 Tbsp fresh Cream (malai)",
1 tsp Cumin seeds
3-4 Tbsp Oil
Salt to taste
Water as required

Method:


  1. Heat 2-3 Tbsp oil in a kadhai and add the chopped onion, ginger, garlic and cashew nuts and saute until the onions are translucent.
  2. Add in the green chilli paste or chopped green chillies. Saute for 1 min. 
  3. Remove from heat into a bowl and allow to cool. Once cooled, grind to a fine paste with little water.
  4. Heat the remaining oil in the kadhai and add the cumin seeds.
  5. Once the cumin sizzles for 30 seconds, add in the methi leaves and continue to cook until the leaves have wilted and halved in quantity.
  6. Now add the ground paste and 0.5 cup of water. Mix and boil until the methi leaves are cooked.
  7. Add in the boiled green peas and salt to taste. Cook for 3-4 minutes on medium heat. 
  8. Slightly whip the cream, so it doesn't have lumps, and add to the kadhai. Mix well and cook on low heat for 2-3 minutes.
  9. Serve hot with roti or naan.


If you liked this, you may also like:

vegan Indian curry made of potatoes and fenugreek leaves
Aloo Methi

matar kachori, green peas stuffed kachori
Matar Kachori
How to make methi rice recipe at www.oneteaspoonoflife.com How to make Fenugreek Pilaf recipe How to make Methi Pulao recipe at One Teaspoon Of Life
Methi Rice


Read more ...

Instant Milk Peda Recipe | Milk Peda Recipe with Condensed Milk | Quick doodh peda recipe [Video]


Instant Milk Peda Recipe | Milk Peda Recipe with Condensed Milk | Quick doodh peda recipe with step by step video instructions. Instant Milk Peda or Doodh Peda is made by combining sweetened condensed milk like mithai mate or milkmaid and milk powder and cooking them on low heat to make instant khova. Pedas are flavored with cardamom, shaped and topped with nuts. Instant milk peda is perfect for festivals like diwali or when you want a quick dessert. This recipe is gluten free and suits a Jain diet.

In a hurry? Jump to Video or Jump to Recipe

milk peda made from milk powder and condensed milk

Milk Pedas are one of the easiest of Indian sweets, especially with THIS recipe.

You know that time, when you had a nice spicy dinner, and then get this sudden sweet craving, but it's already late and you are so cozily dressed up in your pajamas. And you are torn between changing and driving to the nearest sweet mart or trying to suppress that craving. You don't need to anymore, not with this recipe. 

The scene I just described above, is something I experience almost every couple of weeks. And most of the times laziness wins, I hate changing and going out after 10pm. So I mostly settle for maybe a biscuit or when I am in a good healthy-diet sort of mind, a couple of dates or raisins. But mostly, I'm still thinking of delicious desserts in my head. 

So when you aren't freezing brownies for such nights, give this peda recipe a try and I assure you it won't disappoint. In fact, it is so easy, a 12-year-old can make it, so feel free to delegate this to the little chefs at home. My sister actually won a cooking contest in school making this on an old kerosene stove, so you can guess how simple and tasty it really is. 

Instant Milk Peda is made from just a handful of ingredients - ghee, condensed milk, milk powder, cardamom powder and nuts.

milk peda made from milk powder and condensed milk

Notes to make the perfect Pedas

Not that you need too many pointers, but I did somehow manage to mess up this recipe once, so I thought I'd rather share the experience.

  • When I say 5-6 minutes of cooking, I mean it. Unfortunately, the first time I made the pedas, I went by look and feel rather than timing. I ended up with very chewy pedas, almost like a 5-star or caramel candy if you know. Not a pleasant experience for my jaws. So although the mixture looks runny and sticky after 6 minutes, don't cook it too long. At the maximum, based on the heat, you may need 1-2 minutes more. The pedas will harden and set as they cool, so don't worry.
  • What if my advice above failed and you actually undercooked it. Don't worry, put the mix back on the stove and maybe cook for an additional 2-3 minutes.
  • What if you totally missed my advice and overcooked it. Well, at least now you know how strong your jaws are. But don't worry, I actually managed to get this working too. Keep the pedas in the fridge overnight. In the morning, remove them and keep them on the counter and allow them to come to room temperature. Somehow this magically fixed the texture in my case. So it is worth a try, don't you agree?
Also, you can top the pedas with any nuts or no nuts at all. I like almonds and pista, so that is what I used.

Flavoring too is your choice. The traditional flavoring for most Indian sweets is cardamom and I stuck with it. You can use saffron, rose, or kewra too. I've tried the rose and it rocks.

Oh and also, since I'm posting this so close to Diwali, have a happy and safe one. 

I have a Diwali playlist on YouTube, that may interest you too, check it out here.

milk peda made from milk powder and condensed milk

If you made this recipe, let me know! Leave a comment here or on Facebook tag your tweet with @oneteaspoonlife on Twitter and don't forget to tag your photo @oneteaspoonoflife on Instagram. You can also email me at onetspoflife@gmail.com I'd love to see what you are up to.


If you like this recipe, do not forget to share it with your friends and family! 


You can follow One Teaspoon Of Life on FacebookTwitterInstagramPinterest or you can subscribe to One Teaspoon Of Life and receive all the latest updated via Email


Video Recipe


--------------------------------------------------------------------------------------------------------------------------

Instant Milk Peda Recipe | Quick Doodh Peda | Milk Peda with Condensed Milk


milk peda made from milk powder and condensed milk Instant Milk Peda or Doodh Peda an Indian fudge type of dessert / sweet that is made by combining sweetened condensed milk like mithai mate or milkmaid and milk powder and cooking them on low heat. Pedas are flavored with cardamom, shaped and topped with nuts. Instant milk peda is perfect for festivals like diwali or when you want a quick dessert. This recipe is gluten free and suits a Jain diet.

Recipe Type:  Dessert
Cuisine:            Indian
Prep Time:     10 hours
Cook time:     10 minutes
Total time:     20 minutes
Yield:                25


Ingredients:


400gms Sweetened Condensed Milk
1.5 cup Milk Powder or Dairy Whitener
8-10 Green Cardamom
1 Tbsp Ghee
3 Tbsp chopped nuts like Almonds and Pistachios

Method:


1. Peel the cardamom and crush the seeds into a powder. Add 1 tsp sugar to help you pound it into a powder.
2. In a non stick pan, add the ghee, condensed milk and the milk powder.
3. Mix well.
4. Cook the mixture on low heat while stirring constantly to prevent the mix from burning.
5. Continue to cook for 5-6 minutes or until the mix comes together as one mass.
6. Add cardamom powder and mix well.
7. Remove from heat and transfer to a bowl or a plate. The mix will look sticky, but don’t be tempted to cook it more. The pedas will become chewy if overcooked.
8. As the mix cools, it will begin to harden and set.
9. Grease your hands with ghee and take a spoonful of the mix while still warm and shape into pedas.
10. Top with chopped nuts and gently press so that they stick to the peda.
11. Cool completely before serving.
12. Pedas can be stored at room temperature for 1-2 days, after which they are best stored in the fridge. Do not store them for over 5-7 days.


If you liked this, you may also like:
kaju barfi recipe, Indian cashew fudge
Kaju Katli

Coconut Laddoo
Bele holige, obbattu, puran poli, sweet lentil stuffed flatbread
Holige | Puran Poli


Read more ...

Baked Falafel Recipe | How to make baked falafels | Easy falafels recipe [Video]


Easy Baked Chickpea Falafel Recipe. Falafels are usually deep fried patties made of chickpeas or other beans and are a popular snack in the region around Middle East. These vegan and gluten free falafels are made from chickpeas and are baked. They are healthier than the deep fried ones. Baked falafels are a perfect addition to buddha bowls, wraps and pita pockets.

In a hurry? Jump to Video or Jump to Recipe

baked chickpea falafel wraps

We love falafels and hummus. If we could swim in a tub of hummus, we would. The silky-smooth, nutty savory goodness is meant for slathering and swimming in, it really is. Hummus is something I make quite often, it is so easy to make and tastes great with so many things. My favorite meal is really just taking some roti or chapati and slathering the hummus and adding a few julienned veggies like carrots, cucumber, tomato and colored peppers and rolling it up to make a delicious wrap. Lunch, done!!
But the thing I love and don't make enough of is Falafels. These crispy balls/patties of chickpeas are so delicious, yet I've generally avoided making them because deep-frying is not something I like to do too often. But all that has changed since I started baking them.

Baked falafels are really easy to make, healthy and freeze well. These baked falafels are made from soaked dried chickpeas, giving them the perfect texture on the inside. The recipe was the batter is the same as the fried ones, just this is baked, so you are not losing out on taste or texture. 

Making these falafels requires a little planning, just enough time to soak the dried chickpeas. They need a good 8-10 hours soak to become soft and achieve the right texture. If you have this planning done, then you really don't need to do much. The soaked chickpeas are drained, and blended with coriander leaves, onion, cumin, red chilli powder or paprika, salt and oil to get a stiff batter that can be shaped. The falafels are shaped into a patty as they bake better that way instead of a ball.

These baked falafels are the perfect addition to buddha bowls, curries, pita pockets and wraps.

baked chickpea falafel wraps


How to freeze baked falafels?

Once the falafels are baked, allow them to cool completely. Once cooled, you can either place them in a ziploc bag in a layer and freeze them horizontally or place in a freezer friendly plastic box and freeze. These will easily stay good for 1-2 weeks. 

To use frozen falafels, microwave on high until they are warm on the inside. I like to leave them out on the kitchen counter for 1-2 hours before I microwave. You can also pan fry them until they are warm on the inside.

My Falafel Wrap

 The pictures I have posted is of the falafel wrap I built with the baked falafels. 

The wrap has the following:
- Homemade pita bread
- Hummus
- Pickled onions
- Shredded red cabbage
- Cherry tomatoes
- Coriander leaves
- Crumbled feta cheese

The options are limitless, you can add different sauces like tzatziki or tahini or even mayo. Pickled radish or carrots will taste great too. Roasted veggies is another way to go. Mint, parsley or your favorite herbs. Pita bread can be replaced with a regular wholewheat roti or even a leftover restaurant garlic naan. Cheese is optional, use your favorite vegan or non vegan soft cheese if you desire. 

baked chickpea falafel wraps

If you made this recipe, let me know! Leave a comment here or on Facebook tag your tweet with @oneteaspoonlife on Twitter and don't forget to tag your photo @oneteaspoonoflife on Instagram. You can also email me at onetspoflife@gmail.com I'd love to see what you are up to.


If you like this recipe, do not forget to share it with your friends and family! 


You can follow One Teaspoon Of Life on FacebookTwitterInstagramPinterest or you can subscribe to One Teaspoon Of Life and receive all the latest updated via Email


Video Recipe


--------------------------------------------------------------------------------------------------------------------------

Baked Falafel Recipe | How to make baked falafels | Easy falafels recipe

baked chickpea falafel wrapsBaked Falafels are baked patties made of chickpeas, coriander, spices and aromatics. Falafels are popular snack in the region around Middle East. These vegan and gluten free. They are healthier than the deep fried ones. Baked falafels are a perfect addition to buddha bowls, wraps and pita pockets.

Recipe Type:  Appetizer
Cuisine:            Middle Eastern
Prep Time:     8 hours
Cook time:     30 minutes
Total time:     8 Hours 30 Minutes
Yield:                14-15 Falafels

Ingredients:


1.5 cups dried Chickpeas (Kabuli Chana | Chhole)
1 large Onion
5-6 Garlic cloves
1 cup Coriander leaves
1 Tbsp Cumin Powder
1 Tbsp Coriander Powder
1 tsp Red Chilli Powder
0.25 tsp Baking Soda
6 Tbsp Olive Oil
Salt to taste

Method:


1. Soak the dried chickpeas in water for 8 hours or overnight.
2. In the morning, drain the water completely and add to a blender.
3. Add chopped onions, garlic, coriander leaves, baking soda, cumin powder, coriander powder, red chilli powder, salt and 2-3 Tbsp olive oil. Blend to a coarse batter, you should be able to shape the falafels.
4. If the batter feels wet, add in 1-2 Tbsp Corn starch or corn flour to help it bind.
5. Shape the falafels and place in a single layer on a greased baking sheet.
6. Bake for 25-30 minutes at 180 degree celsius or until done.
7. Serve hot with hummus or use in buddha bowl, wrap or pita pocket.
8. Look at notes above if you are planning to freeze the falafels.


If you liked this, you may also like:
Vegan lentil meatballs

vegan pan fried turnip chops
Vegan Turnip Chops
roasted sweet potato, chickpea, quinoa salad with walnuts, pomegranate, broccoli and beans in a mustard date dressing
Roasted Sweetpotato Salad


Read more ...

Batata Vada Recipe | Alugadde Bonda Recipe [Video]


Batata Vada Recipe with step by step video instructions. Batata Vada or Alugadde Bonda are a popular deep fried snack from India. Spiced mashed potato is dipped in a batter of besan or chickpea flour and deep fried. Batata Vada is stuffed inside a pav bread to make the famous street food Vada Pav. Batata Vada is vegan and gluten free.

In a hurry? Jump to Video or Jump to Recipe

batata vada recipe, alugadde bonda recipe, aloo chop recipe

I had batata vada almost every day for a long time until the pandemic hit. Literally every day!!

It was my usual evening snack. I had a routine - get down from my cab, buy a mix of pakodas/bondas (usually, batata vada, masala vada and may be a mirchi vada) and enjoy those with tea while watching something on YouTube. It was my "me" time. Those 15-20 minutes were what relaxed me enough to take on the evening.

Now with no access to the bonda cart and the cravings rising, I had to make them at home. And boy, am I glad to be reunited with one of my favorites. And the day I made these, it rained, it poured.

Happy Days!!

I mean everyone knows, when it rains, you are obligated to have something fried along with your hot cuppa caffeine. And this time, we enjoyed it with these delicious batata vadas.

batata vada recipe, alugadde bonda recipe, aloo chop recipe


The details...


Batata Vada, is thought to have originated in the state of Maharashtra, but is now equally popular all over the country. The Batata Vada forms the "Vada" of Mumbai's favorite street snack - the Vada Pav. If you'd like to make amazingly pillowy soft pav, you can follow our recipe for pav here.

The good thing about batata vada is that you can prep it in advance, so much in advance. And even on the day you are making it, it is very less effort. There are essentially just 5 steps

  • Boil potatoes
  • Make the stuffing
  • Make the batter
  • Dip the stuffing in the batter
  • Deep fry
You can make the stuffing and store it in the fridge until you are ready to fry. The batter is a simple matter of mixing besan (gram flour / chickpea flour) with a handful of readily available pantry spices like turmeric powder and red chilli powder and salt. A pinch of baking soda makes the coating thick. If you are not fond of the thick coating, don't add the baking soda and make the batter a little thin. 

And don't worry if you mess up the batter, it is SO easy to fix it. If the batter is too thick - add a little water to thin it down. If you added too much water in the batter, add in more flour and adjust the spices as required. If you made too much batter, you can either dip other vegetables and fry to make mixed pakodas or you can also use it to make Vegan Omelet, or Tomato Omelet.

Deep fry in hot oil so that the vadas soak up less oil.

Always serve the vadas hot. Always!!

batata vada recipe, alugadde bonda recipe, aloo chop recipe

If you made this recipe, let me know! Leave a comment here or on Facebook tag your tweet with @oneteaspoonlife on Twitter and don't forget to tag your photo @oneteaspoonoflife on Instagram. You can also email me at onetspoflife@gmail.com I'd love to see what you are up to.

If you like this recipe, do not forget to share it with your friends and family! 


You can follow One Teaspoon Of Life on FacebookTwitterInstagramPinterest or you can subscribe to One Teaspoon Of Life and receive all the latest updated via Email


Video Recipe


--------------------------------------------------------------------------------------------------------------------------

Batata Vada Recipe | Alugadde Bonda Recipe


batata vada recipe, alugadde bonda recipe, aloo chop recipeBatata Vada or Alugadde Bonda are a popular deep fried snack from India. Spiced mashed potato is dipped in a batter of besan or chickpea flour and deep fried. Batata Vada is stuffed inside a pav bread to make the famous street food Vada Pav. Batata Vada is vegan and gluten free.

Recipe Type:  Snacks
Cuisine:            Indian
Prep Time:     15 minutes
Cook time:     20 minutes
Total time:     35 minutes
Yield:                12 to 14


Ingredients:


For the potato stuffing:


8-10 boiled Potatoes (750 gms)
2-3 Tbsp Oil
1 tsp Mustard Seeds
2 Green chillies, finely chopped
1 Tbsp crushed Ginger Garlic or Ginger Garlic Paste
1 tsp Turmeric Powder
2 Tbsp chopped Coriander leaves
0.25 tsp Asafoetida or Hing (Optional)
Curry leaves
Salt to taste

For the besan batter for coating:


1 cup Besan (Chickpea flour)
1 tsp Turmeric Powder
1 tsp Red Chilli Powder
0.25 tsp Baking Soda
Salt to taste
0.5 to 0.75 cups of Water

Method:


1. To make the besan batter for coating, add all the ingredients except water to a large bowl. Slowly add the water while whisking with a fork or a whisk until smooth. The amount of water you add determines the thickness of the coating, so for a thick coating, add less water. For a thinner coating add more water. 
2. To make the stuffing, peel the boiled potatoes and roughly mash them. There should still be chunks in it. Don't mash it until smooth.
3. Heat oil in a kadhai and add the mustard seeds.
4. Once they splutter, add the hing (if using) and the curry leaves.
5. Then add the crushed ginger garlic or ginger-garlic paste and green chillies. Saute until fragrant.
6. Add the turmeric powder (haldi) and mix well. 
7. Add the mashed potatoes and salt and mix well until the potatoes are coated with the turmeric powder.
9. Turn off the heat and add chopped coriander leaves. Mix well and remove to a large bowl. Set aside until it is cool enough to handle.
10. Once the stuffing is cool, make balls out of it. The size can vary from that of lime to a tomato. 
11. Heat oil for deep frying in a kadhai or deep pan.
12. To check if the oil is hot, add a small piece of potato to it, if it rises immediately, the oil is hot.
13. Dip the stuffing potato ball into the besan batter and add to the oil carefully. Do not crowd the kadhai. 
14. Once the lower side is cooked and set, gently flip the vadas in the oil.
15. Fry until the vada is completely cooked. Stir the vadas occasionally to cook them evenly.
16. Once golden brown, remove the vadas to an absorbant paper.
17. Serve the batata vadas while hot with ketchup or chutney.


If you liked this, you may also like:

masala vada, ambode, chana dal vada recipe
Masala Vada

maggi instant noodles fritters fried pakoda chickpeas besan
Maggi Pakoda
how to make vegetable cutlets recipe, aloo tikki recipe, vegan cutlet recipe, beetroot cutlet recipe at www.oneteaspoonoflife.com
Vegetable Cutlets


Read more ...

Kadhai Mushroom Recipe [Video]


Kadhai Mushroom Recipe with step by step video instructions. Kadhai Mushroom is a spicy vegan curry made with mushrooms, capsicum and onions in a tomato based gravy. Kadhai Mushroom can be made either into a dry/semi-dry curry or into a curry with gravy. Kadhai Mushroom is vegan, gluten free and fits a plant based diet.

In a hurry? Jump to Video or Jump to Recipe

Kadhai Mushroom curry with capsicum and onions


I love Mushrooms. It is the meat for vegetarians with loads of umami in it. There is seriously no other veggie that provides that elusive 5th taste that our beloved MasterChef Australia judges talk about.
Btw, are you watching the 12th season? The back to win series with the new jury? I'm completely hooked on.

What is Kadhai Mushroom?


Kadhai is literal terms is an Indian wok or the little vessel you see in my photos. That is a kadhai. So Kadhai Mushroom just translates literally to mushroom cooked in a wok. But as a dish, it is so much more than just that.

Kadhai Mushroom is a spicy melee of mushrooms, capsicum and onions simmered in a freshly ground masala that is so fragrant and a bit of tomato puree for that tartness and body for the curry.

This is probably one of the only curries where I don't substitute the masala with my Garam Masala. It just doesn't taste the same. The fresh masala adds so much flavor that it is almost a sin to substitute it with any store bough mixed spice powder. So I highly recommend making your own spice blend, just for this, and maybe then using it for myriad other curries. 

Kadhai Mushroom can either be a dry or a semi dry curry or it can be a curry with gravy. Every restaurant serves it differently and so can you.

Kadhai Mushroom curry with capsicum and onions

The details...


Kadhai Mushroom is probably one of the easiest curries to make. To make Kadhai Mushroom, toast the whole spices - coriander seeds, cumin seeds, green cardamom, black cardamom, bay leaf, cloves and pepper. Toasting on low heat makes the spices release their oils and makes them more fragrant. Toast the dry red chillies, if using. This can be substituted with red chilli powder or with paprika without affecting the flavor and there is no need to toast it either. Once everything has cooled, make a quick powder.

Next, saute the mushrooms and keep them aside until later. If you don't have the time to do this, just toss them into the curry later and allow them to cook in the masala.

The onions and capsicum are cut into large chunks. This is meant to be a chunky curry. They are sauteed along with ginger garlic paste until they are cooked slightly. Do not overcook the capsicum, it is meant to retain the crunchiness.

Then the tomato puree, turmeric, salt and masala is added along with desired amount of water and the curry is simmered for a few minutes. The mushrooms are added at the end and given a quick stir.

The kasuri methi or dried fenugreek leaves provide an additional salty bitter fragrance that goes superbly with the curry.

Kadhai Mushroom can be served as a side with roti or naan bread or even with rice.

Kadhai Mushroom curry with capsicum and onions

If you made this recipe, let me know! Leave a comment here or on Facebook tag your tweet with @oneteaspoonlife on Twitter and don't forget to tag your photo @oneteaspoonoflife on Instagram. You can also email me at onetspoflife@gmail.com I'd love to see what you are up to.

If you like this recipe, do not forget to share it with your friends and family! 


You can follow One Teaspoon Of Life on FacebookTwitterInstagramPinterest or you can subscribe to One Teaspoon Of Life and receive all the latest updated via Email


Video Recipe


--------------------------------------------------------------------------------------------------------------------------

Kadhai Mushroom Recipe


Kadhai Mushroom curry with capsicum and onionsKadhai Mushroom is a spicy vegan curry made with mushrooms, capsicum and onions in a tomato-based gravy. Kadhai Mushroom can be made either into a dry or semi-dry curry or into a curry with gravy. Kadhai Mushroom is vegan, gluten free and fits a plant based diet.

Recipe Type:  Curry
Cuisine:            North Indian
Prep Time:     10 minutes
Cook time:     30 minutes
Total time:     40 minutes
Yield:                Serves 2


Ingredients:


200gms Mushrooms
1 Capsicum
1 Onion
1 cup Tomato Puree
1 Tbsp crushed Ginger-Garlic
1 Tbsp Coriander Seeds
1 tsp Cumin seeds
3-4 dry Red Chillies or 1-2 tsp Red Chilli Powder
0.5 tsp Black Pepper
2 Green Cardamom
2 Cloves
1 Black Cardamom
2 Bay leaves
0.5 tsp Turmeric Powder
1 Tbsp Kasuri Methi
4 Tbsp Oil
Salt to taste
Water as required

Method:


1. In a kadhai or pan, dry roast the coriander seeds, cumin seeds, green cardamom, black cardamom, 1 bay leaf, cloves, dry red chillies and black pepper for 1-2 minutes until fragrant. Remove from heat and allow to cool. Once cool, grind to a fine powder.
2. Cut the onions into petals and chop the capsicum into large chunks. Halve the mushrooms.
3. In the same kadhai heat 1-2 Tbsp oil and saute the halved mushrooms until cooked. Remove from heat and keep aside.
4. Add the remaining oil and add the onions, crushed ginger garlic and 1 bay leaf and saute until the onions are slightly soft.
5. Add the capsicum and fry until the capsicum is slightly browned.
6. Add the tomato puree, turmeric powder, ground masala, red chilli powder if using, salt and saute on low heat for 2-3 minutes.
7. Add water as desired, and simmer for 4-5 minutes on medium heat.
8. Add the mushroom and mix well.
9. Top with kasuri methi and mix well.
10. Serve hot with roti and rice.


If you liked this, you may also like:

Lahsuni Methi Mushroom

How to make vegan Goan Portuguese Mushroom Cafreal curry at www.oneteaspoonoflife.com
Mushroom Cafreal
mix vegetable gravy paneer jalfrezi indian
Vegetable Jalfrezi


Read more ...